
Make a Mechanical Hand (Instructor Guide)
Students create a mechanical hand that mimics the bending and straightening of their own fingers and thumb.

Overview
STEM careers
Grade level
Time
Materials
Per Person or Team:
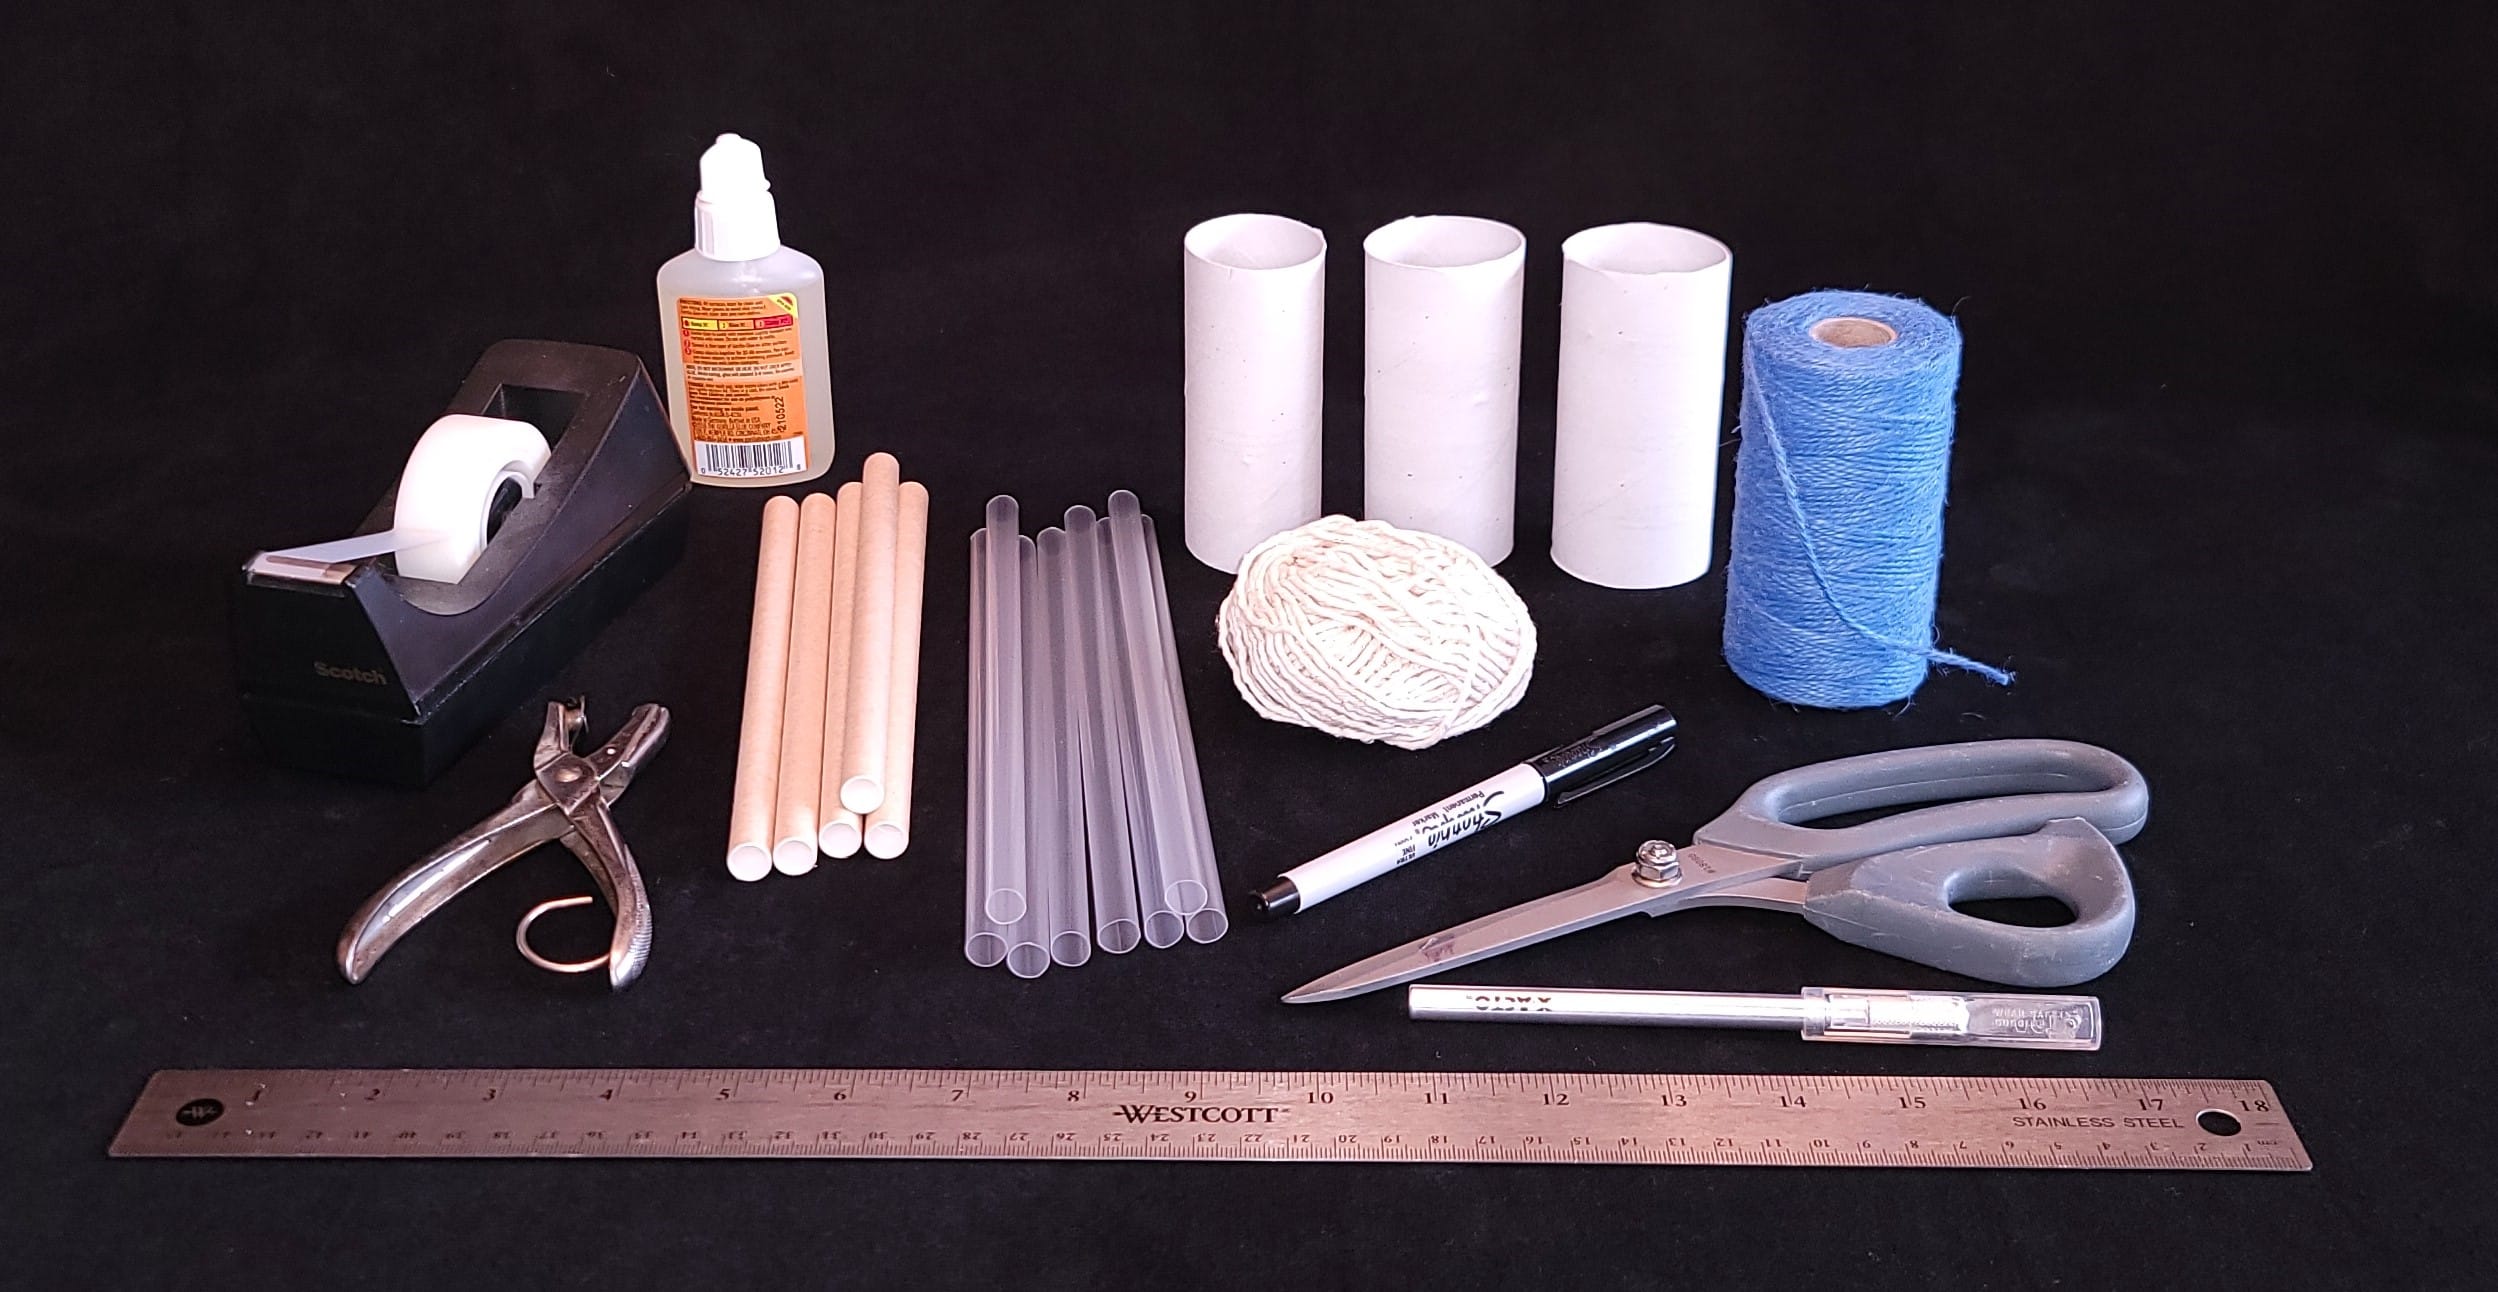 Stuff to make the hand and fingers: cardboard and/or cardstock paper, regular or jumbo straws, toilet paper or paper towel rolls
- Stringy stuff representing tendons (the cords connecting muscle to bone): string, yarn, heavy-duty upholstery thread, twine
- Stuff to assemble the hand: tape, glue, staples
- scissors, craft knife, or similar cutting tool
- paper hole punch
- ruler
- fine-tip marker
- sketching materials
- optional: transparent gloves for activity extension
Important notes on selecting materials:
- The larger the straw or tube diameter, the easier it will be for younger students to thread string through.
- The stiffer the stringy stuff, the easier it will be to thread through straws.
Introduce
The human hand is an amazing feat of engineering. I bet you can think of 20 things it can do just off the top of your head. We’d be pretty helpless without at least one hand. Engineers study the mechanics of hand movement and its structure to design robotic hands for people who have lost a hand or whose hands don’t work anymore. These mechanical hands can make many of the same movements as human hands. And engineers have designed robotic hands for manufacturing and surgery that are more precise than human hands!
Student Challenge:
- Design and build a mechanical hand with fingers that bend and straighten like a human hand.
Success Criteria
- The fingers and thumb must bend at joints located in the same places as on a human hand.
- After the fingers and thumb bend, they must be able to straighten again.
Constraints
- Use only the materials provided (but you don’t have to use them all)
- The hand has to have four fingers and a thumb.
- The mechanical hand does not need to be the same size as a human hand.
Instructions
DEFINE THE PROBLEM
- Share the challenge, success criteria, and constraints with students.
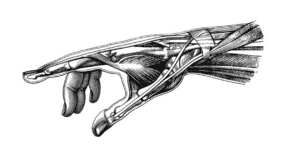
- Ask students to straighten out their fingers and splay them like a fan. Now tell them to make a fist. Ask, how do you think we can make these motions? How do you think the different bones and muscles connect to bend your fingers and thumb? Encourage students to watch their hands carefully as they make these motions, and have them share their observations. As needed, explain the following:Humans have 14 finger bones, known as phalanges, connected by joints and ligaments. Each finger has three bones and three joints that can only bend and stretch in one direction. The thumb has two bones and can twist, unlike the fingers, because of the specially shaped joint that attaches it to the hand. But the fingers and thumb have no muscles. We move them using the tendons that connect to muscles in the hand and forearm.
- Show students the materials. Get them thinking more specifically with questions like these:Observe your fingers as they bend and straighten. Where are the joints on each finger? Notice that the thumb’s joints are different from the fingers and can move with a different range of motion.Which of the materials could act as the tendons inside the fingers that make them move? Inside our fingers are tendons that are like long strings. Tendons connect to muscles on one end and bones on the other. To move a finger, muscles in our hands or forearms pull a tendon, which pulls on a bone in our finger. When the muscle pulls, the finger bends at the joint.
 How will you make fingers that can straighten out again after they bend? Your mechanical hand has to have fingers that bend but that also straighten out again, in the same way that a human hand works.
BRAINSTORM SOLUTIONS
- Distribute the materials. Give students time to explore the properties of the materials and do some experimenting as they plan their design. Ask them to think about how they can secure the tendons in place to make the fingers flex and straighten at the joints, as well as how they can build a sturdy palm for the fingers to sit against. Encourage them to test ideas for getting their hand to repeat motions before they finalize their design.
For younger students or those who need some guidance, show them how to thread a string through a straw, which represents the finger. Have them observe how you knot the string in place on one end of the straw; alternatively, wrap the string over the end of the finger and tape it (experiment beforehand to choose the best method for your students and the materials you’ve gathered). If students struggle to figure out how to use the straws and string as tendons, demonstrate carefully cutting out small triangular notches in a straw to correspond to finger joints (making sure not to cut the string inside the straw). Pull the end of the string on the other (not knotted or attached) end so that they see how the straw bends at the notches and then straightens when you release the string.
BUILD AND TEST
- Tell students to build their mechanical hands. Assure them that after they test their first designs, they can change and improve their hands. Hint: See if a straw with notches in it works better or if a straw cut into pieces does. Which way creates a finger that can both bend and straighten?
- During testing, have students demonstrate their hand bending and straightening the fingers and thumb. Can any of the hands actually grasp and pick up an object? Encourage students to closely observe each team’s demonstration so that they can get ideas for improving the movement, durability, and reliability of their own mechanical hand.
EVALUATE AND REDESIGN
- Once everyone has had a chance to test their design, hold a discussion. What were the characteristics of the hands with fingers that bent and straightened the most reliably? What design elements worked and what didn’t? What improvements would you like to make
- Tell students to gather another set of materials and try again. For teams whose mechanical hands bent and straightened easily, set the challenge of improving their design so that their hand can pick up an object.
Guiding questions
-
Which method of putting the string through the bones and joints results in the least tangling?
-
What is the weak point for the hand to bend all four fingers plus the thumb simultaneously?
-
What happens if you try to put your finger bones and tendons inside a plastic glove hand and stuff it to be more lifelike?
-
Watch your thumb move compared to your fingers. How can you place the joint in the thumb to mimic the movement of your own hand?
Engineering & science connections
- Scientists, doctors, and engineers use special terminology to describe how fingers move. Flexion means moving the base of the finger—the part closest to the hand—toward the palm. Extension means moving the base of the finger away from the palm. If your fingers are fanned out, you use adduction to bring your fingers together toward the middle finger, and you use abduction to move them away from the middle finger.
- Biomedical engineers apply their engineering expertise to solve problems in the fields of biology and health care. They work with doctors, researchers, and therapists and develop new technologies that can save lives or greatly improve them. These engineers have transformed the making of artificial body parts, known as prosthetics. They have developed prosthetic feet with biomechanics a lot like human feet, so people can climb stairs, go on hikes in the mountains, and even play tennis. Biomedical engineers have created hands that can “feel” with sensors attached to nerves in a person’s arm!
- Biomedical engineers are constantly perfecting the technology required in robotic surgery. Surgeons routinely use robotic surgery—surgery assisted by robots—to perform very complex operations with a high degree of control and precision. The surgeon looks at a computer and guides robotic arms to use surgical instruments; they can see the operation with more clarity and depth thanks to robotic cameras. Patients heal faster and have smaller scars because this type of surgery is less invasive than other methods.
0 Comments