Overview
Materials
Per Team of 4-6 Students:
- Bridge specs, materials list, and schedule (see Instructions)
- Building materials:
- Straws
- Paper cups
- Scotch tape
- Play money
- 0.5L bottle filled with water
- Measuring tape
Instructions
Students discover what it’s like to work in teams to build a bridge within strict constraints on materials, time, and money.
- Place students in teams. Their goal is to build a bridge on schedule, within a specific budget, and with limited materials.
- Give students these specifications:
- The bridge must span a distance of 30cm between 2 desks.
- It must be able to support a 0.5L bottle filled with water.
- It must be constructed exclusively with materials purchased for this project.
- Give students the schedule:
- The design phase, for planning the bridge and obtaining materials, is 10 minutes. All materials must be purchased during this phase.
- The implementation phase, for bridge construction, is 15 minutes.
- Testing is 5 minutes
- Give students the budget:

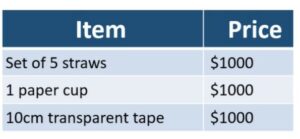
- The total budget is 20,000 of your local currency, in an appropriate denomination. Distribute play money.
- 5 straws = 1000
- 1 paper cup = 1000
- 10 cm scotch tape = 1000
- Place materials in a central location for purchase. Set a timer for each phase and tell students to proceed. (Hint: it may be more economical to create rectangle shapes with the straws taped together side by side and put on edge rather than to use the straws individually or taped together and put horizontally like a deck. This will allow fewer straws to resist more load.)
- For the test phase, take the bottle filled with water and test each bridge in turn to see if it supports the weight.
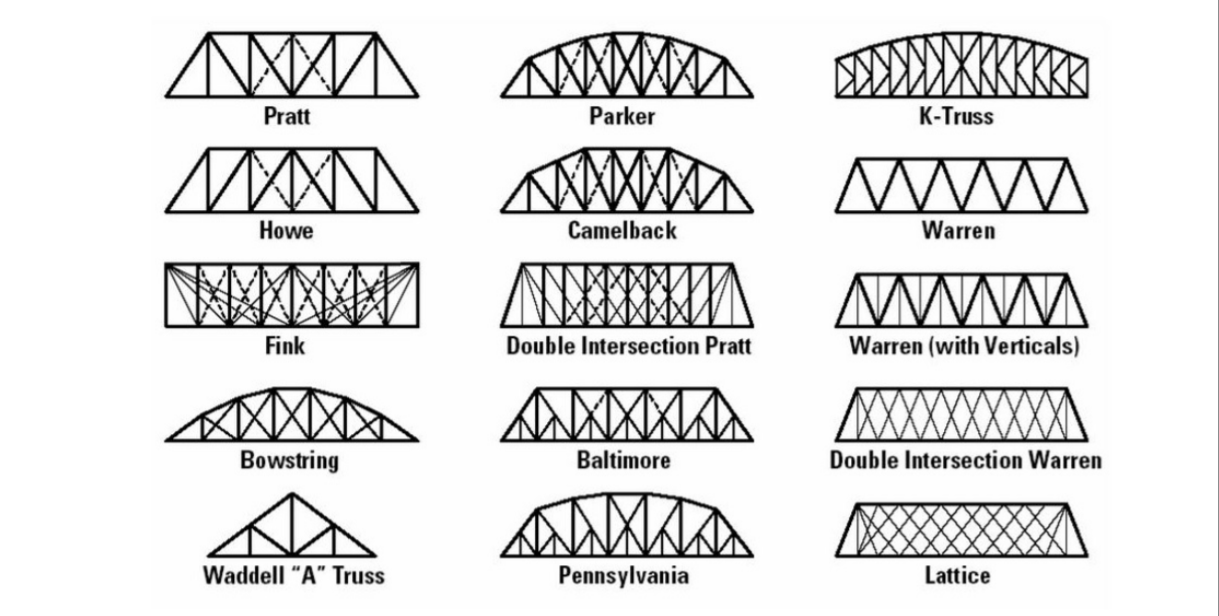
- Optional: After the testing is all complete, project the image of common truss styles (below) to help guide discussion of the results.

Guiding questions
-
Did your final design turn out as planned? If not, how could you change it?
-
What roles can team members play to optimize efficiency?
-
What are some differences in the designs of the bridges?
Engineering & science connections
- Engineers work under strict constraints for time, budget, and materials. Building a bridge economically involves considering: how soon the work needs to be completed, what materials are available in the area at what cost, and what design can best deliver within these constraints.
- There are many different types of bridge designs and each design depends on its function. The four most common designs are the beam bridge, truss bridge, arch bridge, and suspension bridge. When choosing which type of bridge to build, engineers must consider the weight or load that the bridge must support, the distance the bridge has to span, and the weather and environmental conditions of the area.
- The Golden Gate Bridge is a world famous bridge in San Francisco, California. It is called a suspension bridge because its deck is suspended from cables. To design this bridge with support other than suspension cables would have been much more expensive and time consuming, requiring more materials to achieve the same strength.
Thanks to Steve Delach in Oregon for providing this activity idea.

0 Comments