
Build a Better Bubble Blower
Participants select the ideal materials from those provided as they design, build, and test a bubble blower. They also consider what fills a bubble (a gas) and why a bubble is a sphere.

Overview
STEM careers
Time
Materials
Supplies & Equipment:
|
Consumables:
|
Relevant Terminology
Bubble solution: A mixture of liquid soap and water that we use to blow bubbles.
Gas: A substance like air that has no shape of its own but instead spreads out to take the shape of its container. The air inside a bubble is a gas. (For older participants: Gas presses equally on the thin skin of the bubble solution and makes the bubble’s shape a sphere.)
Liquid: Something like water, juice, or milk that flows and takes the shape of a container. The bubble solution is a liquid.
Sphere: A three-dimensional shape that is round like a ball, not flat like a circle. A bubble is a sphere.
Introduce
GETTING READY
Spread plastic sheeting to cover your tables or floor. Pour bubble solution into shallow bowls or trays.
INTRODUCTION
Ask participants some questions to get them thinking about tools for blowing bubbles:
- How big a bubble can you blow?
- How many bubbles can you blow at the same time?
- What makes something a good bubble blower?
Then say, “Let’s pretend that we are engineers who work at a bubble wand factory. Engineers are people who solve problems. Our problem is that we want to make the best bubble blower possible.”
Instructions
Introduce the challenge by explaining that participants will design, build, and test their own bubble blowers.
Decide whether the “best” bubble blower is one that makes the biggest bubble, or one that makes the most bubbles.
Display the building materials and model how each item might be used. For example, a pipe cleaner can be bent and twisted into a circle or another shape. A button can be taped to the top of a straw. A straw can be used to poke a hole in the bottom of a Styrofoam cup.
Note: With young children, practice blowing out through a straw before allowing them to put the straw in the solution. Preschoolers may accidentally suck up bubble solution if using straws.
Place materials and trays of bubble solution on tables or on the floor. If working on the floor, participants should find spots around the outside of the plastic sheeting. Once blowing bubbles, they should avoid walking on the sheeting, as the bubble solution will make it slippery. As participants work and experiment, ask them what type of bubble they want their blower to produce.
Evaluate the success of each design.
- Did the blower produce bubbles?
- Did the blower produce the type of bubbles the participants intended?
ACTIVITY VARIATIONS
Challenge participants to engineer a bubble blower to blow only large or only small bubbles.
Build a bubble blower that produces foam, rather than single bubbles. Vary the materials provided.
For older participants, introduce additional challenges. For example, engineer a bubble blower that prevents the user’s hands from getting wet. Participants might also engineer and test new bubble solutions.
If you have access to a 3-D printer, you may wish to design and print your own bubble blowers as an activity extension.
TROUBLESHOOTING
- If participants have trouble producing bubbles, remind them to blow steadily, rather than quickly and forcefully—like blowing dandelion seeds, not like blowing out birthday candles.
- Adding corn syrup or glycerin to your bubble solution may help to produce more robust bubbles.
Guiding questions
GUIDANCE FOR YOUNGER CHILDREN
QUESTIONS TO ASK AFTER THE ACTIVITY
- What did you make your bubble blower out of?
- What kind of bubbles did your blower make: Big ones? Little? Lots? Only one?
GUIDANCE FOR OLDER YOUTH AND ADULTS
QUESTIONS TO ASK AFTER THE ACTIVITY
- How did you decide what materials to use to make your bubble blower?
- How do you think the length of the tube you blow through affects the kind of bubbles you make?
- Is it better to have a stiff material for where the bubbles emerge or a flexible material? Why do you think so?
- Was your design successful at making the biggest/most bubbles? How can you improve it next time?
- How might you increase the number of bubbles it creates?
- Why do you think a bubble is always round? Can you create a bubble wand that blows square bubbles?
Engineering & science connections
GUIDANCE FOR YOUNGER CHILDREN
Engineering Connections
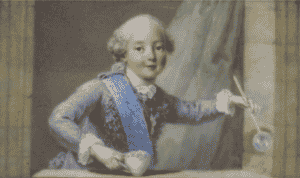
Phillippe de France blowing bubbles in a painting from the 18th century. Straws are some of the earliest bubble-making toys. Later inventions improved on this design.
People have been blowing bubbles for hundreds of years. But not that long ago, you couldn’t buy bubbles or bubble blowers in stores the way we can today. The bubble solution and bubble blowers we use today were designed by engineers who work for toy companies.
Engineers who design and make toys have to make sure that the toys are fun but also safe to use. They make bubble solution that doesn’t have chemicals that would make people sick and bubble blowers that blow many different types of bubbles. Most of your toys were probably designed by an engineer working for a toy company! Think about your toy cars, building blocks like Legos, and especially any toys that move or make sound. An engineer had to make sure that all your Legos would snap together correctly, that the wheels on your car would turn, and that the wires inside your toy hook up to the batteries the right way. Without toy engineers, your toys might not work!
Science Connections
When you think of one bubble, what shape do you imagine? Bubbles are spheres, like balls. The air inside the bubble pushes out evenly in all directions—which makes the round, sphere shape that we imagine. Other things in nature, like planets and suns, are spheres for the same reason. All of the forces and stuff on the inside are pushing out evenly in all directions.
GUIDANCE FOR OLDER YOUTH AND ADULTS
Engineering Connections
Even when we’re careful, bubble solution sometimes accidentally gets in our mouth or on our skin when we’re blowing bubbles. Since engineers already know this might happen, they only use safe ingredients in the bubble solution they make. By using different ingredients, engineers have invented many amazing different types of bubble solution! For example, some bubble solution has ingredients that help you blow bubbles that are huge. Some ingredients let you blow bubbles that don’t pop, even when they land on your hands, and some make bubbles that glow in the dark, or glow under an ultraviolet light. An astronaut named Naoko Yamazaki has even blown soap bubbles in space! What type of bubble solution would you invent?
Science Connections
Soap bubbles are an extremely thin layer of liquid soap and water surrounding a pocket of gas, usually air. For a given volume of air, the geometric shape that can enclose it with the smallest possible surface area is always a sphere; this, combined with the surface tension of water, is why bubbles are round. Though very large bubbles may create long, wobbly shapes, they will all eventually become spheres if they last long enough without popping.
Water has a high rate of cohesion, which means water molecules tend to stick to each other better than they stick to other things (adhesion). Because of this, water has high surface tension. You may have noticed that if you fill a glass of water all the way to the top, then fill it just a tiny bit more, the water can actually rise above the surface of the glass without spilling. This tension is strong enough that if you are careful, you can float a paperclip on the water’s surface.
Every bubble is made of three layers: two layers of soap molecules on the outside, and a layer of water sandwiched in between. The soap molecules on either side stick together and hold the water layer in place.
Activity Created by Carnegie Science Center. All rights reserved.
Supplemental content adapted for Dream Big Activities by the Carnegie Science Center.
0 Comments