Overview
STEM careers
Time
Materials
Supplies & Equipment:
|
Per Team:
|
Relevant Terminology
Surface area-to-volume ratio: A comparison of the size of an object’s surface area to the amount of space it occupies. As an object gets larger, its surface area-to-volume ratio decreases.
Introduce
GETTING READY
This activity challenges participants to build a dome out of materials of their choosing. The materials listed here make a good dome “starter kit”; feel free to provide additional materials as you see fit. Other materials, such as pipe cleaners, wire, spaghetti, and mini marshmallows, also make good building materials.
Prepare your building area by neatly arranging supplies on a table.
INTRODUCTION
Buildings are engineered to protect us from the elements, but there is more than one way to build a structure. Domes have been an important aspect of architecture for thousands of years, going back to the ancient Romans. Ask:
- What are some dome buildings you are familiar with?
- What advantages or disadvantages do domes have compared to rectangular buildings? (Pro: less building material, more volume/space. Con: no flat walls, hard to use all the space effectively.)
- What makes a dome strong?
Instructions
Introduce the design challenge. Teams of 3 or 4 participants will design and build a dome that can support at least 60 pennies on the top.
- Participants may choose from any of the materials provided to build their dome.
- There is no limit to the amount of materials used.
- The dome must be no more than 12″ high and fit within a 12″ square.
- The dome needs to support a paper cup on top.
Encourage participants to plan their dome before building. Get them thinking about the properties of the materials provided and how to build a strong structure. Participants can also make a sketch to help them build.
Allow the teams 15 minutes to construct their designs. Participants can connect elements of their dome with tape, string, or any other materials you provide.
Test each dome by adding weight to the paper cup until the dome collapses or you get to 60 pennies. Add a little bit of weight at a time (a US penny is 2 grams), keeping track as you go. Redesign domes that did not support at least 60 pennies, and then retest.
ACTIVITY VARIATIONS
Make a contest to see who can build the dome that supports the most weight, or the dome that has the best strength-to-weight ratio.
Build a dome that is large enough to sit in. Provide fabric or other materials to cover the dome to make a tent.
TROUBLESHOOTING
Some teams may become frustrated and need more direction. You can provide hints and suggestions, but refrain from building a dome for a struggling team.
Guiding questions
GUIDANCE FOR PARTICIPANTS
QUESTIONS TO ASK AFTER THE ACTIVITY
- Which materials worked best in the construction of your dome? Are there any materials that you wish you had that you didn’t?
- Do you wish you could have spent more time to get it right? Do you think that engineers might run out of time too?
- What surprised you about making your dome?
- How would you change your dome if you could continue to make it?
Engineering & science connections
GUIDANCE FOR PARTICIPANTS
Engineering Connections

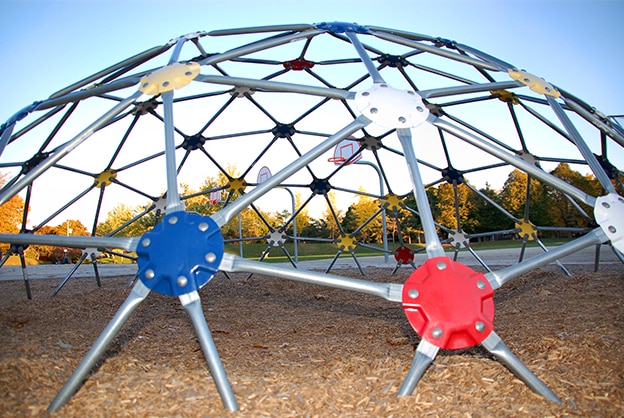
A simple geodesic dome. Notice the dome’s truss design, which uses interconnected triangles. Credit: Leah-Anne Thompson – Shutterstock
Building a dome is no easy feat and requires a lot of collaboration. Architects and engineers often collaborate, or work together, to build all types of structures, including domes. The responsibilities of these two careers often overlap but are both important to the design and construction of a structure! Architects design spaces to meet client needs and are mostly concerned with the visual appearance, both inside and out. An engineer’s main responsibility is to ensure that the architect’s design is safe, that it meets building codes, and, most importantly, that it works!
Engineers also carefully choose the materials to be used to build structures. That’s why they must have a good understanding of natural resources and their properties. Civil, architectural, structural, electrical, and mechanical engineers all play a role in the construction of buildings. Together, architects and engineers communicate with each other using blueprints and technical drawings, and they meet often in person.
Science Connections
All three-dimensional shapes have surface area and volume. The shape that encloses the most volume with the smallest surface area is the sphere—and a dome is part of a sphere. That means a dome is the shape that can enclose the largest space using the fewest materials. The larger you build a dome, the greater the surface-area-to-weight ratio, and therefore the more efficient it becomes.
You can see dome shapes used for their strength properties in nature. Eggshells, which we think of as fragile, are domes. They are actually very strong—strong enough to allow the weight of an adult bird to rest on them without breaking. Many animal skulls are also domes at the top, providing a great strength-to-weight ratio.
Activity courtesy of IEEE TryEngineering.org. All rights reserved. http://tryengineering.org/lesson-plans/design-dome
Supplemental content adapted for Dream Big Activities by the Carnegie Science Center.


0 Comments