Overview
Materials
Per Pair:
|
Recommended Docs:
|
Relevant Terminology
Acceleration: The process of moving faster or happening more quickly. As the ping-pong ball moves down the zip line, it accelerates, or goes faster.
Force: A push or pull on an object. Gravity is a force that pulls us toward the center of the Earth.
Friction: The force that slows objects down when they are rubbing against each other. Some things make lots of friction, like brakes on a tire, and some make very little friction, like skates on ice.
Gravity: A force of attraction that occurs between all objects. We experience it as the constant force that pulls objects toward the center of the Earth.
Mass: The amount of matter in an object. The more the mass, the heavier the object.
Slope: The direction and steepness of a line. Slope is measured by the vertical drop divided by the horizontal distance covered by the line.
Speed: The distance traveled over a period of time. If something is accelerating, it is moving at a faster speed.
Weight: The force of gravity on an object. The more something weighs, the stronger the force of gravity.
Introduce
GETTING READY
Be sure to address the following logistical issues before the beginning of this workshop:
- Prior to the workshop, be sure to have enough copies of all of the handouts for all participants as well as some extras. There are additional recommended handouts to supplement the course content that are available online, but you may choose to make your own or use any of the other many options available.
- Create your own brief movie and/or trailer to gain some familiarity and comfort with the applications. At the end of the workshop, you will need to screen the movies using a projector or large monitor. Consider one of the following options:
- Install Google Drive or Dropbox on each iPad. Pairs upload finished movies from the iPads. A central computer with access to the same Google Drive or Dropbox folder, hooked to a projector or monitor, can be used to access and show them.
- When it is time to show each movie, direct connect each individual iPad to the projector or monitor using the proper cable
- Connect a projector or monitor to an Apple TV device. With the Apple TV app, each iPad can stream directly to the Apple TV, which will then display the movie to the group.
- You could create a YouTube channel where students can upload their movies. This will allow them to share with friends or family who may not otherwise be able to see them.
- It is useful to have an engineer on hand to answer questions that the participants are likely to have about their engineering concept (e.g., “How does a truss disperse a load?”)
INTRODUCTION
Connect a projector or monitor to an Apple TV device. With the Apple TV app, each iPad can stream directly to the Apple TV, which will then display the movie to the group. You could create a YouTube channel where students can upload their movies. This will allow them to share with friends or family who may not otherwise be able to see them. It is useful to have an engineer on hand to answer questions that the participants are likely to have about their engineering concept (e.g., “How does a truss disperse a load?”)
Instructions
- Start by describing the challenge and goals of the workshop: One of the most important skills that an engineer can have is the ability to describe what her solution is, even if she is talking to someone who is not an engineer. Dream Big is a film that shows how engineers solve problems to build safer and stronger communities. How do you create a movie to tell a story in which the primary story arc is an engineering concept?
- Begin with some “Speed Dating”-type icebreakers where participants can get to know each other. Each participant should meet at least three to four other people who they’ve not met before during this activity.
- After the ice-breaker activity, participants should choose “Thinking Partners” with whom they will be working for the remainder of the workshop. If there is any awkwardness or participants who struggle to form pairs, the facilitators should assist with teaming them up.
- Once the pairs have been formed, they will determine the parameters of their movie. This is accomplished by determining the following facets:
- The engineering concept that will form the foundation of their story arc. Fill a hat with a minimum of three different concepts or enough where each group will have their own unique concept to explore. There should be enough paper slips so that all groups can pick one. Suggested engineering topics could include:
- Getting into space
- Earthquake protection/Absorbing energy
- Prototyping
- Making models
- The interface between the built world and the natural world
- Using renewable energy to accomplish everyday tasks that currently use fossil fuels
- Robotics
- Asking questions
- Building taller, thinner, and lighter
- The genre of their movie. Each group can select the type of movie that they would like to produce. See the Film Genres handout at the end of this activity. Be sure to give each group a copy of the handout and then review the description of the primary characteristics of each genre type.
- A line that must be integrated into the script of every movie. Which line will be used should be determined democratically. Give the participants four lines to choose from. The line that receives the most votes from the group must be incorporated somewhere in each of the group’s movies. Some lines that you could use include:
- “If I agreed with you, we’d both be wrong.”
- “You can’t handle the truth!”
- “I’ve got a bad feeling about this.”
- “The player received no further instruction.”
- However, feel free to devise others if you are so inclined, or have the groups each submit their choice and then vote on the one to be used by all groups. Note: If you allow groups to submit ideas, they should not be allowed to vote for their own idea.
- The engineering concept that will form the foundation of their story arc. Fill a hat with a minimum of three different concepts or enough where each group will have their own unique concept to explore. There should be enough paper slips so that all groups can pick one. Suggested engineering topics could include:
- Participants will need some basic instruction on the use of iMovie. This is best accomplished by providing them with the iMovie Cheat Sheet handout (available online) or a similar one and showing them a brief tutorial video. These are readily available on YouTube. One such tutorial can be found here: youtube.com/v/NCTQjmsCZRk.
- Storytelling 101 (15 minutes). Give participants the recommended online handouts Camera Shots, Angles, and Movement, Story Arc Diagram, and Pixar Storytelling Formula. What are the key aspects of a story? How does its creator create tension or resolve a conflict? These should be discussed during this part of the workshop. During this time, the facilitator should describe how different camera shots, angles, and movement affect the viewers’ experience. The facilitator should also present the traditional storytelling formula that begins with the Introduction, goes through Conflict and Climax, and ultimately ends with the Resolution. Students then outline these four basic parts of their movie using the Pixar Storytelling Formula worksheet or through a similar activity.

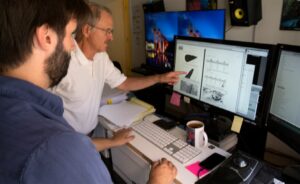
Steve Judson and Jason Paul develop a storyboard for Dream Big.
- Brainstorming (15 minutes). This is a key part of this activity. This is the time when participant pairs will collaboratively develop the arc for their story. If participants are allowed to pursue their own idea, they will develop a story with a great relationship to the concept that they have chosen. For example, one pair creates a story where two bodies of water that were “siblings” were given individual time-outs for bad behavior by the building of a dam between them. As with brainstorming in the design process, there are a few important parameters about which the participants should be aware.
- One idea at a time;
- Go for quantity;
- Build on others’ ideas—“Yes, and…”
- No judgment of others’ ideas.
- Discussing the reasons for these rules with the participants will yield productive brainstorming sessions and a quality end product.
- Researching, Foraging, and Observing (20 minutes). After the participants have determined the general story arc, they will have time to tour and browse the science center/aquarium/museum. During this time, they will be looking for exhibits and locations at which they can film various aspects of their movie.
- Storyboarding (20 minutes). During this time, participants should map out their overall story arc using the guidance provided by the Storyboarding 101 handout and blank storyboard organizers. Storyboarding is a process by which each shot of the movie is sketched and/or described to provide a detailed concept of the way in which the story will be told. It is useful to have the students draw/describe each shot on a Post-it note and then place them on the Storyboarding Blank rather than draw or write directly on the blanks themselves. This method enables them to add, delete, or reorder shots to adjust their story without starting their storyboards over.
- Lunch. Now that the stories are all mapped out and storyboarded, it is a good time to decompress, eat lunch, and share their ideas with other participants.
- Storyboard Walk and Feedback (30 minutes). During this time, one member of each group stands by their storyboard while the other walks around and looks at those from the other groups. Those walking around should look at every other storyboard, ask questions as necessary from the person attending it, and then complete two Post-it note prompts for each group’s storyboard. The prompts are “I wonder…” and “I am excited by…” These are designed to help the groups refine and revise their stories to make them more complete, interesting, and well-structured before they begin filming. The facilitator should reinforce that these comments should be written to be positive and constructive. Halfway through the allotted time, the group members should switch roles so that everyone has a chance to view and comment on every other group’s storyboard.

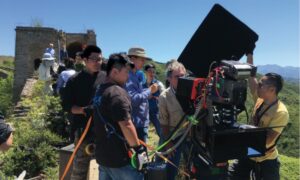
Brad Ohlund and his team on a location shoot for Dream Big.
- Film production (45–75 minutes). During this time, participants should film their shots based on their storyboards. If you are in a science center or other site where there might be good spots for “location” shots, give participants both the freedom to use available resources while limiting everything that they may want to use (e.g., “You may film anywhere on the first floor.”). Be sure to remind them that they should be considerate of other people and not impose on their experience. Also, groups should be encouraged to work together and share resources during this time. There may be a need for additional actors, extras, or film crew that can be filled by in-kind donations between groups.
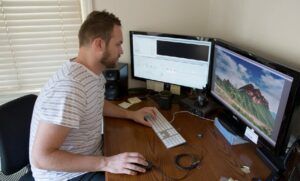
- Editing. Instruct participants that they should return to the meeting room at a designated time at least 45 minutes prior to the Film Festival. This will allow them ample time to edit together and render their movie. If you do not enforce this, participants will likely spend too much time filming and will not have time to edit together their final movie. If pairs still need more time to film, allow them to go out for an additional 10–15 minutes after they have checked in. However, make sure that they are required to edit for at least 30 minutes in the meeting room. Required components of the finished film are:
- Title at or near the beginning
- Credits at the end

Brad Ohlund and his team on a location shoot for Dream Big.
- Story arc that matches the plan
- Engineering concept is addressed and correctly discussed
- Film Festival. The time needed for this depends on the number of groups and the length of each film. Having 5–7 minutes per pair is recommended. Invite the parents of the participants for this portion so that they can see what their kids have created during the workshop. If you have a theater on site, arrange for popcorn and drinks to create a movie theater atmosphere. Have each group introduce their film and then show each one. Be sure to clap after every one!
ACTIVITY VARIATIONS
- Have the participants create a trailer or blooper reel for their movie. iMovie has several trailer templates that make this both easy and fun. Have them screen the trailers before their movie.
- Encourage pairs to locate, download, and incorporate free special FX into their movies. There are many free resources for this online.
- Add a few additional hours or a second day to allow extra time for each part of the activity, especially the filming and editing. This can result in much higher-quality films.
TROUBLESHOOTING
- Since this workshop is tech-heavy, be sure to check that all of your iPads and tech are charged and working prior to the beginning of the workshop. Have some spare iPad chargers and cords on hand also.
- Be sure that you are able to get a completed film from the iPad to a monitor or projector on which it can be screened for the entire group. If you are relying on Wi-Fi for Apple TV, open-source video clips, or special FX downloads, be sure that it is working correctly and that all iPads can connect to it. Check the speed of the Wi-Fi to ensure it allows for efficient file uploads and downloads.
Guiding questions
GUIDANCE FOR PARTICPANTS
QUESTIONS TO ASK AFTER THE ACTIVITY
- How do you think this activity relates to being an engineer?
- What was the hardest part of this activity?
- What was the easiest part?
- What would you do differently if you had more time?
- Did your movie follow your storyboard exactly or did you make changes along the way? If so, what were the changes?
- How is the process that you went through in creating your movie similar to the engineering design process?
Engineering & science connections
GUIDANCE FOR PARTICIPANTS
Engineering Connections
The engineering design process is a method by which engineers first identify a problem and then formulate a plan to solve it. It always starts with defining the problem that needs to be solved and always ends with communicating the solution to others. One of the most important skills that an engineer needs is the ability to describe what her solution is, even if she is talking to someone who is not an engineer. If an engineer can’t explain what her solution is or how it is useful, it is not much different than having no solution at all.
Based on the activities titled “SmashJam” and “i5” from Carnegie Science Center. “SmashJam” was developed in conjunction with the Western Pennsylvania Writing Project and National Writing Project as part of the NSF-funded “Intersections” program to bridge science and literacy.
Supplemental content adapted for Dream Big Activities by Carnegie Science Center


0 Comments